Painting and Repairing a Peeling tin ceiling
December 17, 2017
Weathered Deck Restoration in Methuen, MA
February 27, 2018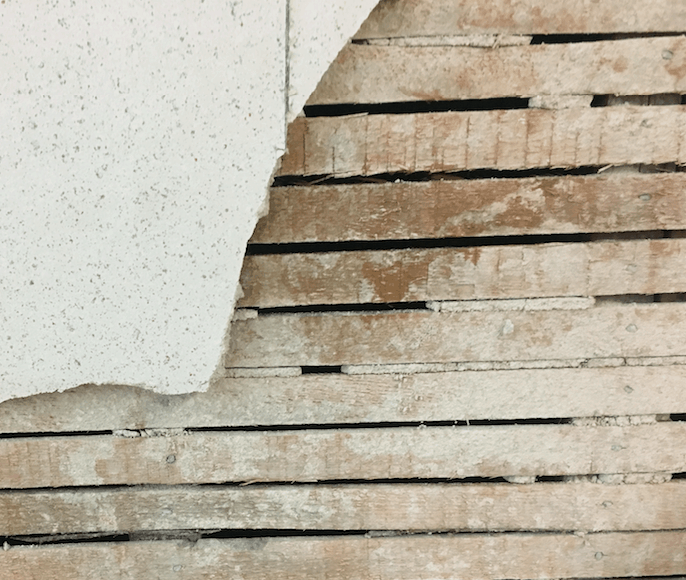
Plaster and Lath repair
We were recently called into a church meting room to repair on hundred and fifty year old walls that were crumbling and
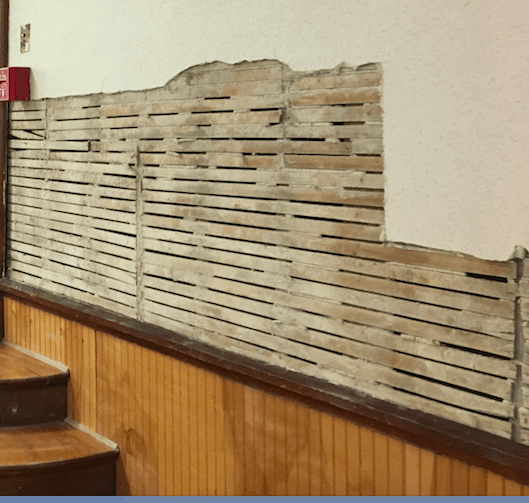
plaster and lath repair
loose due to their age. These walls were near a staircase that receives a good amount of hand touching over the years. This with the age of the building, interaction with people and hat we found was a slight movement in the wall the plaster had cracked.
What is Plaster and lath walls:
Plaster and lath is a combination of spaced wood laths nailed to the framework of the home. A plaster mixture is then mixed and spread over the laths which are spaced with approximately a half-inch in between each which allows the plaster mixture to push thru (ooze) and dry which locks the dried plaster in place. The dried plaster on the back side of the finished walls curls around the laths as it dries. These are called curls.
Between approximately 1900 and 1920 Horse Hair was added to the plaster as a reinforcement to the plaster. Prior o adding the horse hair as a reinforcement plaster was known to crumble very easy f disturbed when hanging pictures or disrupting the wall for any reason. This may be seen as hairs in the wall when repairing or removing the plaster.
Repair or Replace Lath and Plaster walls?
I will walk thru two scenarios and the steps it will take to perform each repair or replacement:
Replacing Lath and Plaster walls with sheetrock:
please note: any time you disrupt plaster on the wall for either replacing or repairing a large section this procedure will be quite messy and dusty so always were a dust respirator and protect all surfaces for the debris and dust.
- protect all areas with heavy plastic and or drop cloths.
- a hammer is sometimes required to assist in braking the bond with the plaster and laths as the plaster in some cases is still adhered to the wall with the curls that formed when the plaster dried.
- remove the plaster and laths from the wall. There will be numerous small tack nails that is left behind from removing the laths, this will need to be removed
- when removing all debris use rubber barrels as the plaster edges can be sharp and will puncture plastic bags. You will also find the plaster debris is quite heavy.
- Prior to installing new wallboard in an older home you might want to contact an electrician to add or adjust electrical outlets and switches.
- Due to the age of your home shimming of studs, adding studs or nailers might be required as home building was quite different and standards varied by builder.
- Installation of sheetrock and finishing now can be performed as it is in every other sheetrock project.
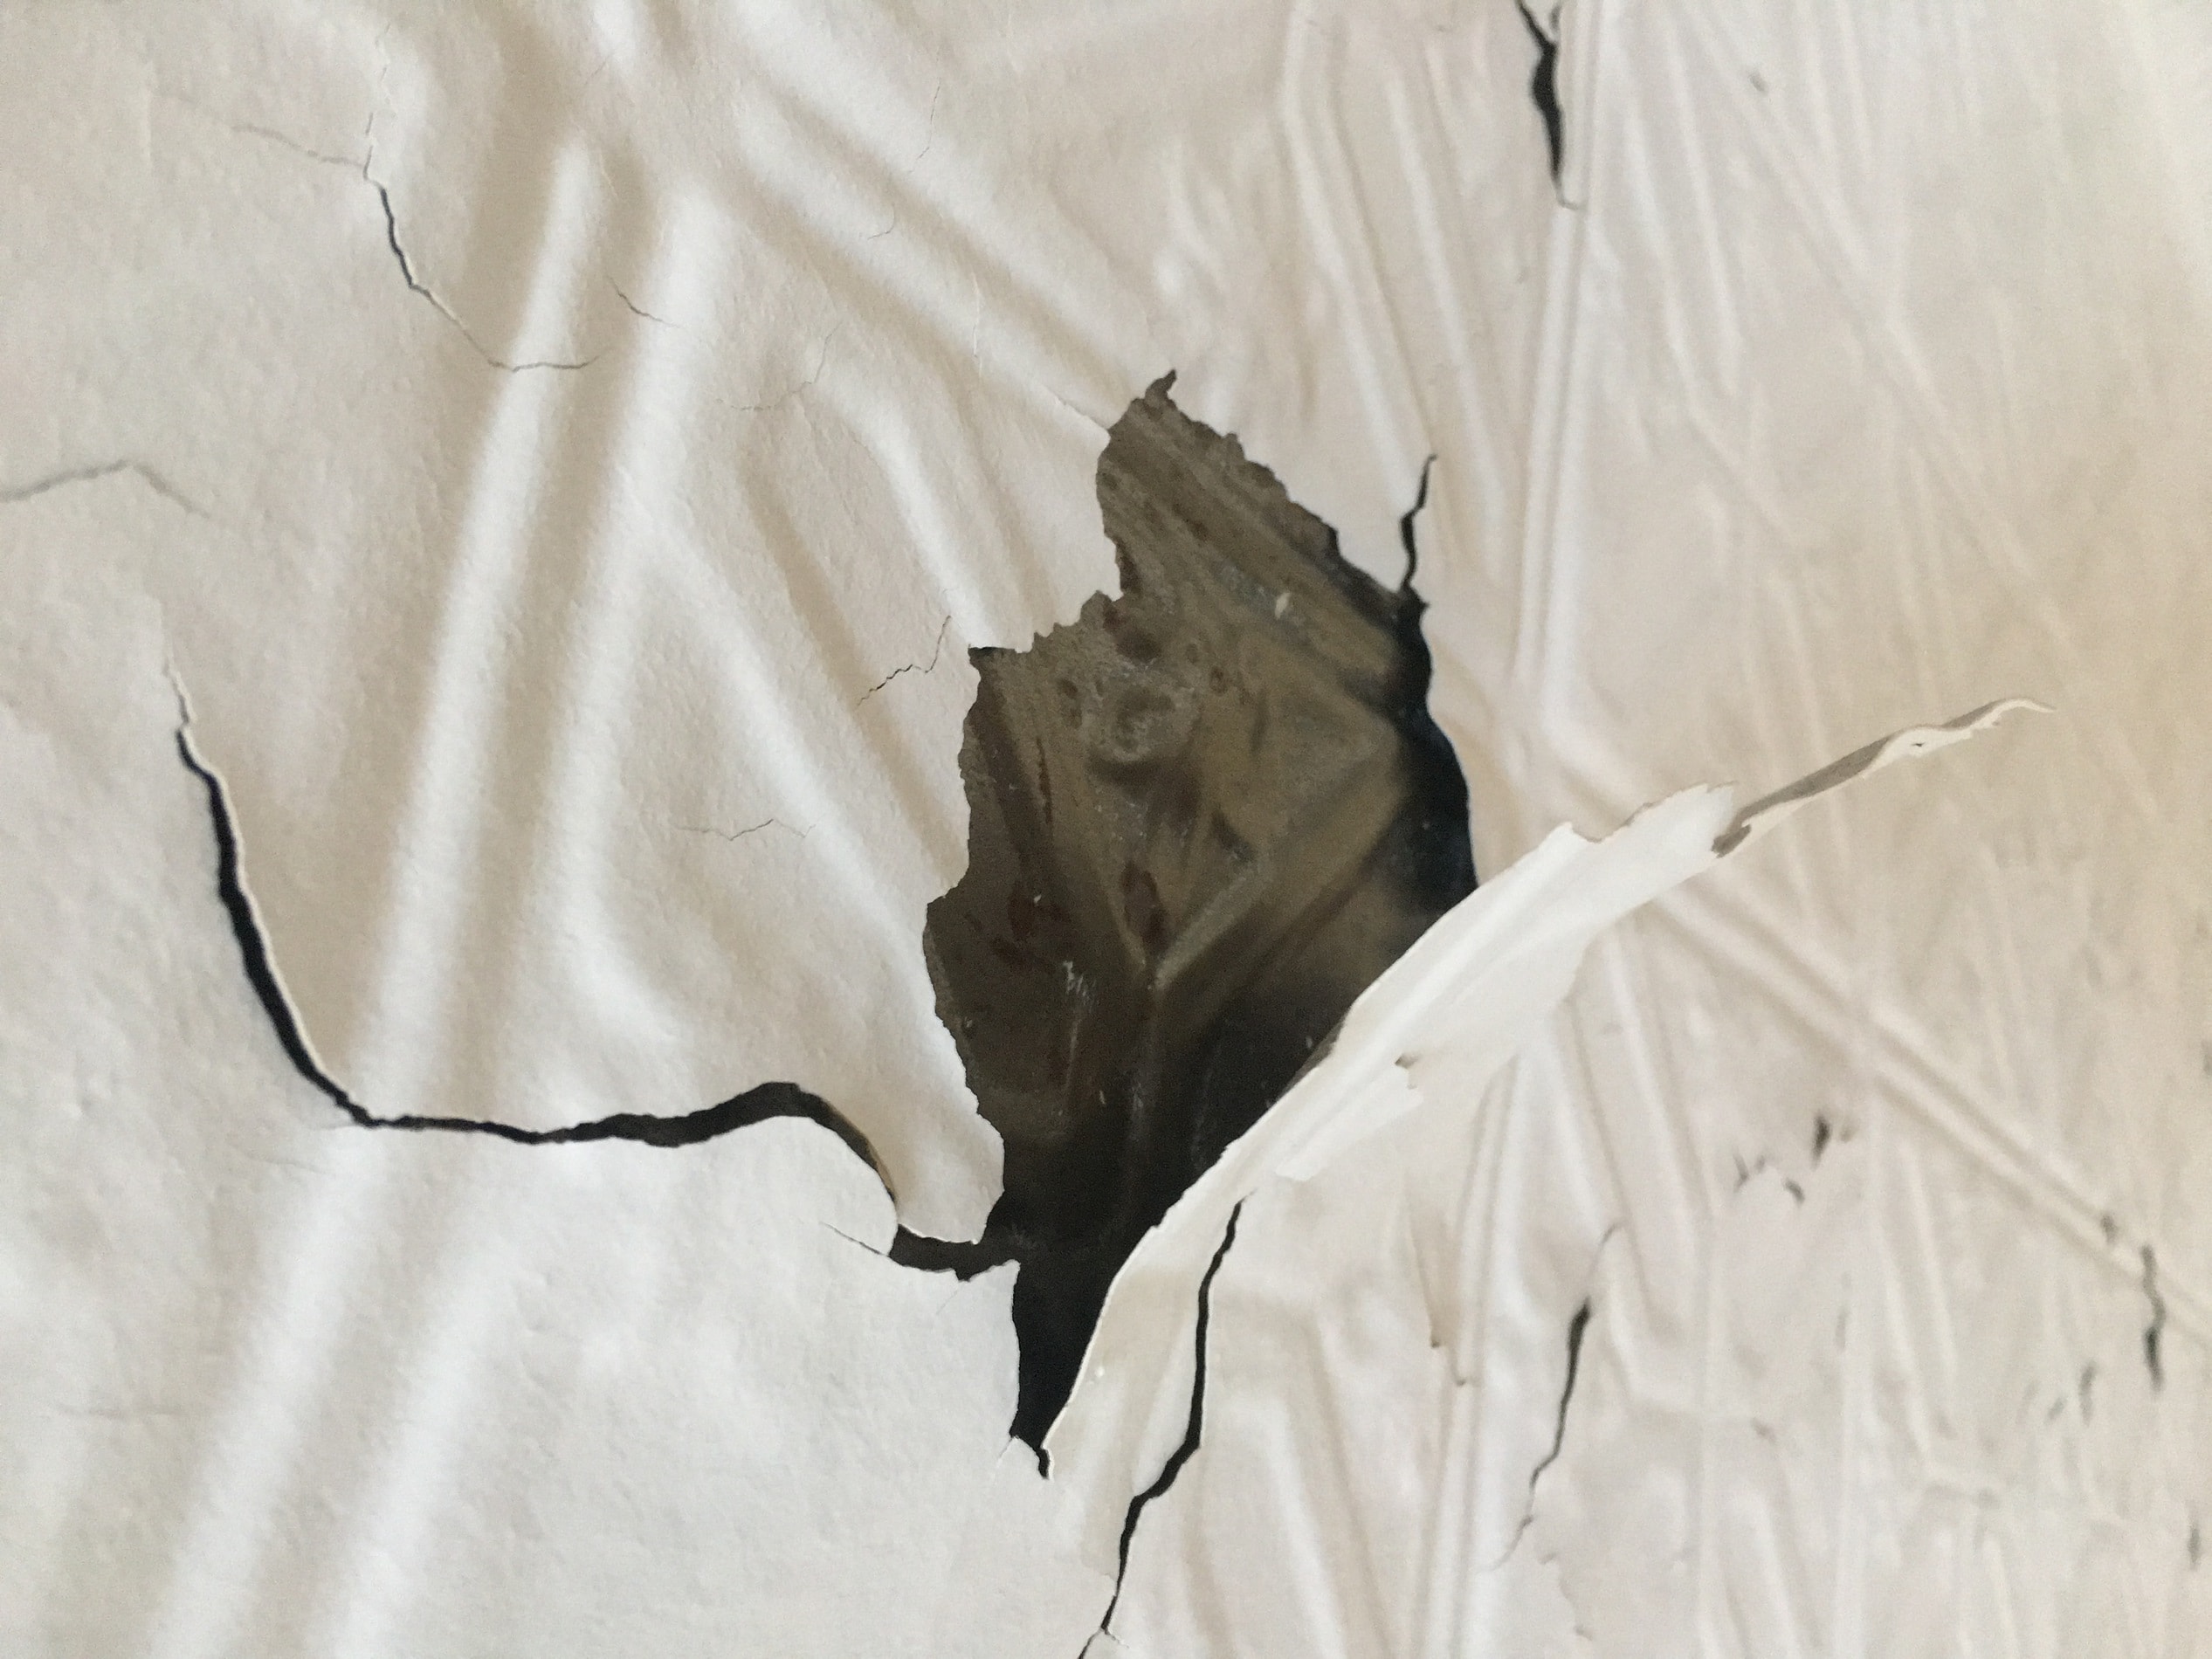
Repairing plaster and lath:
- similar to the above, please protect for potential mess and dust.
- remove loose or cracked area as similar to be seen in attached picture.
- utilize plaster buttons and sheetrock screws to secure loose areas of the existing plaster (see pic) this allows the
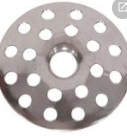
plaster and lath repair
new plastering compound to attach to the existing plaster as well as provide a broader surface for the new screw to “grab” the older plaster.
- Attach to the missing plastered areas sheetrock and tape and smooth to finish.
- at this point we usually prime the entire wall for a consistent finish including the newly repaired area as well as the existing wall we did not repair to provide a consistent finish product.
- Apply finish paint as needed.
Thank you for reading and if you have any questions on need some assistance on your plaster repair or painting project we would be glad to assist.
Regards,
Ron Ramsden, owner
Ramsden Painting
978-683-9119
