I HATE my old wallpaper, what do I do now?
September 15, 2015
4 Outstanding Interior Painting Tips to Add Spaciousness To Your Small Room
September 17, 2015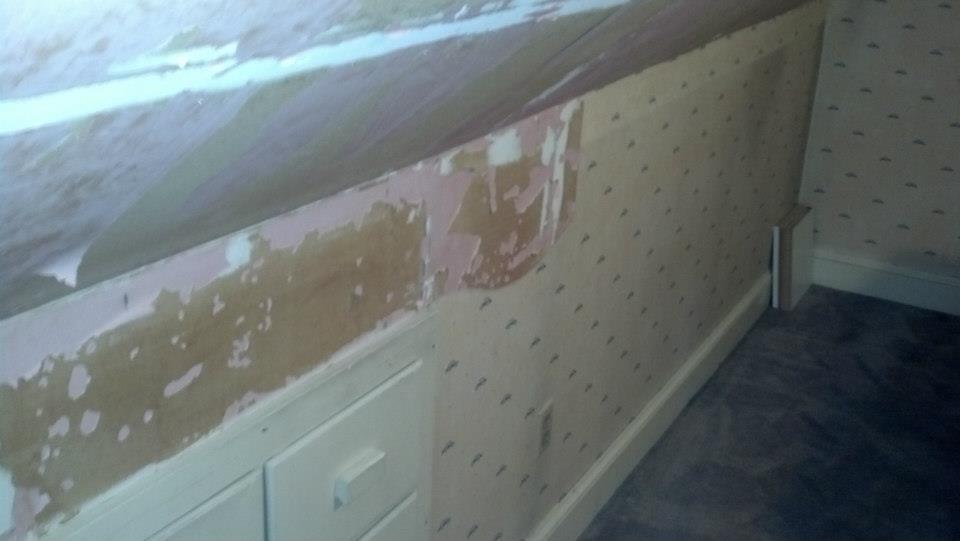
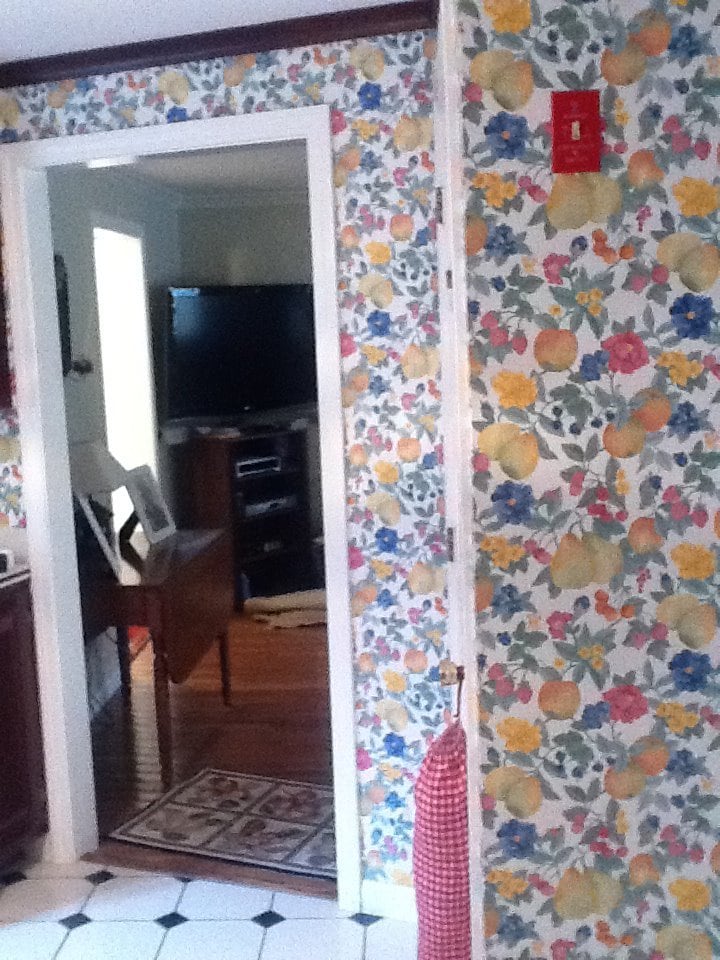
You have removed all the old wallpaper and now it is time to paint.
I hope your the removal process went smoothly as we had kitchens that took two experienced men two days to remove the old wallpaper. You just never know what you are getting into when you start the process of removing the paper.
Now Lets Prepare the Walls for the New Paint.
- Make sure the walls are dry before starting anything.
- There is glue on your walls that you can feel and also some that you can not see.
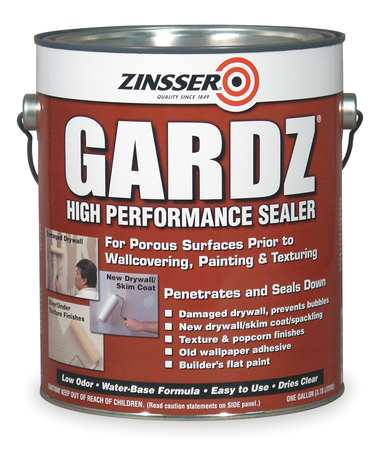
- Now it is time to seal the walls for repair and repainting utilizing either an oil primer or a product
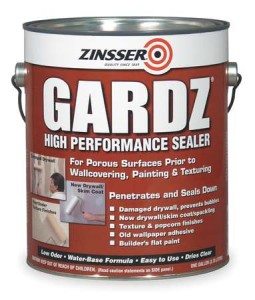 called Gardz. If a latex primer is used at this point it could activate any glue left on the walls and will result in a bumpy, textured surface.
 - Apply the oil primer or Gardz and let dry. (hint: tinting the primer to the color you will be choosing to paint will show any wall imperfections at this point)
- repair all wall imperfections.
- sand and vacuum off the walls.
- caulk all areas were the baseboard, crown molding and trim meet the walls for professional clean results. (do not purchase the lowest price caulk it will separate from the trim and walls)
Now lets Paint the Walls:
In the many families of paint from all the different manufactures you will be dizzy and possibly confused by the options of paints to use on your walls. I always suggest purchasing the best paint you can afford. There is a significant difference in quality in a low price paint and a medium priced paint.
If you are saving $15.00 a gallon on a gallon of paint and using two gallons for the repaint of the room, think back and how much labor has been performed removing the wallpaper and prepping the walls. A few dollars spent on a quality paint will make all the difference.
We use Benjamin Moore Regal Select and Sherwin Williams Emerald paints for our wall repaints.
